I’ve recently relaunched my blog (hi everyone!), I’ll migrate some old content and scrap others. While I clean up the content however I wanted to share how the new site has come into being.
Sculpin
I’ve moved away from a CMS (my earlier iterations were all on WordPress) and opted in favour of a simple static site. I can always spin up micro projects on the many free or cheap PaaS providers.
Sculpin is a beautifully simple yet very powerful static site builder. I write my posts in markdown, tweak some HTML templates in twig, then use sculpin (it’s a CLI tool) to mash it all together. If you’re not a PHP chap then thats cool too, there’s Jekyll and Octopress to name but a few.
There’s plenty of posts and content around covering sculpin, so I’ll avoid going into too much detail. (If you want more tweet me to say so). However I do want to briefly highlight this awesome feature:

Sculpin has a built in server that recompiles my static site whenever I add new content! There’s no need to manually build every time to check layout and alignment.
Codeship
Most developers I’ve seen host their static site blogs on github pages, and that’s cool. I opted for something slightly more complex to give me a little more flexibility in the future. Codeship is a cool startup (though they’ve been around a few years now). In this instance, I use their CI/CD service to rebuild my static site and deploy it.
I’m cheating slightly in that there’s no actual ‘tests’ for my blog. Instead I use this step to build my blog. Since it’s scriptable I have the flexibility to introduce grunt and other tools into the pipeline in the future.
A simple build config looks like this:
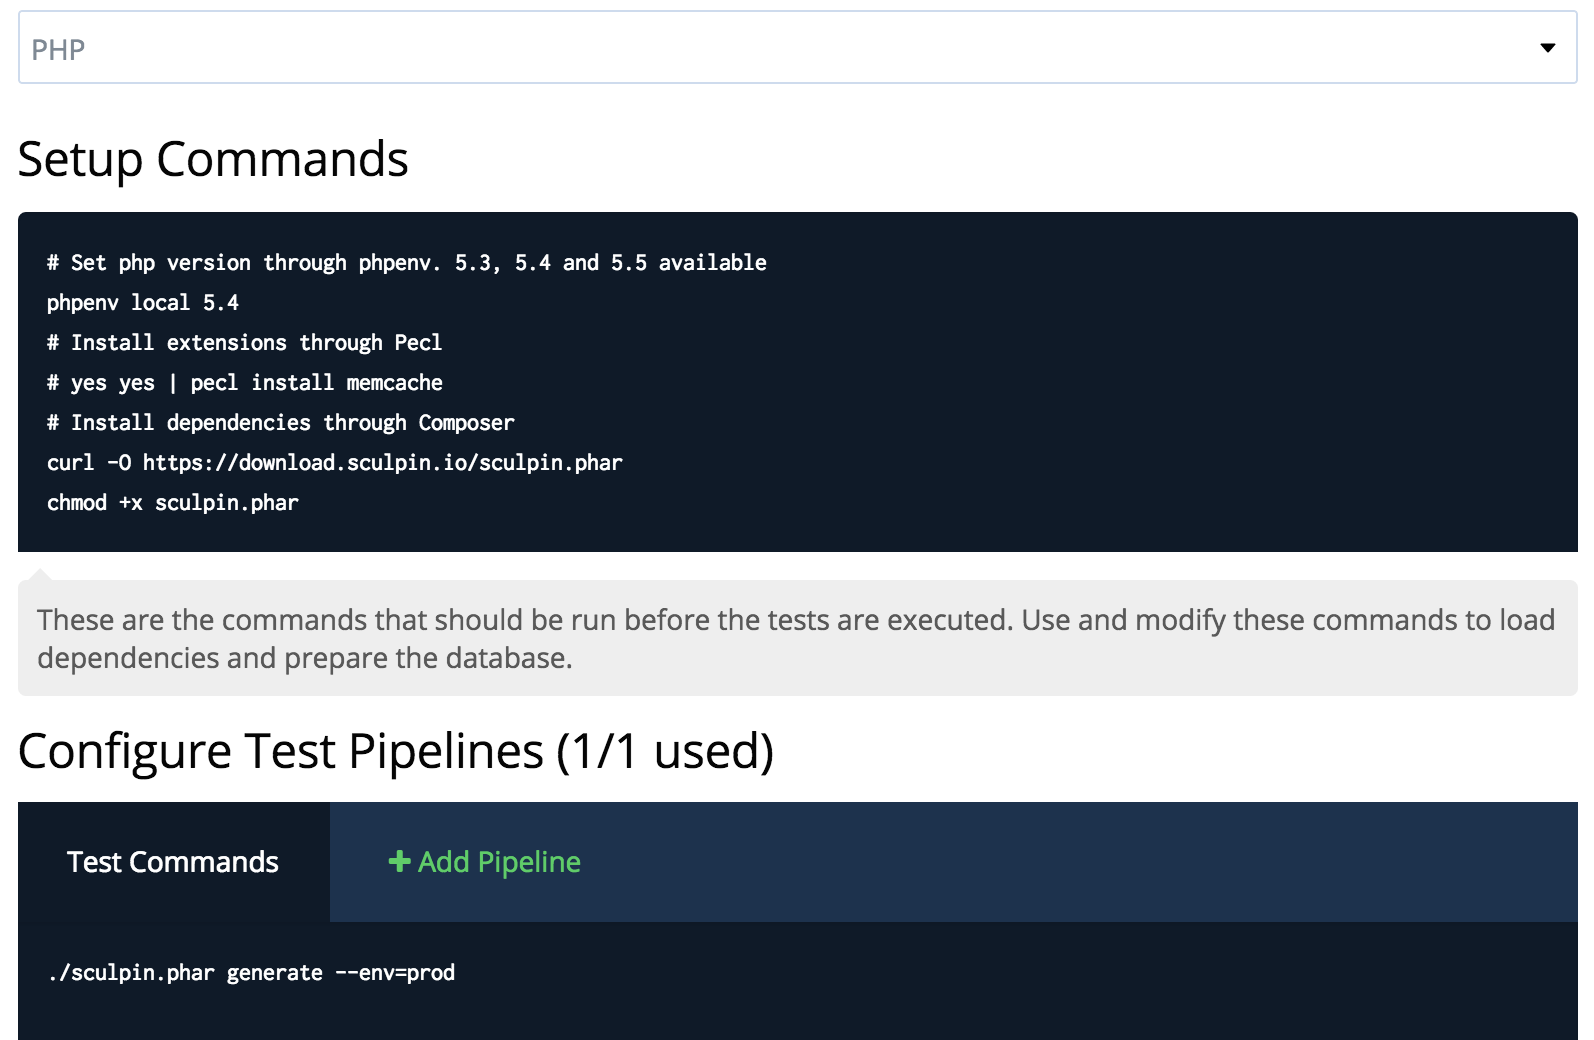
Once built, it’s a simple deployment configuration (just copy and paste S3 credentials) and I have Codeship throw my newly compiled site into an S3 bucket

AWS
Yup, I’m using AWS to host developerjack.com. Over complicating it? I like to think not – there’s not a single EC2 or ELB etc. in my setup!
S3 Website Hosting
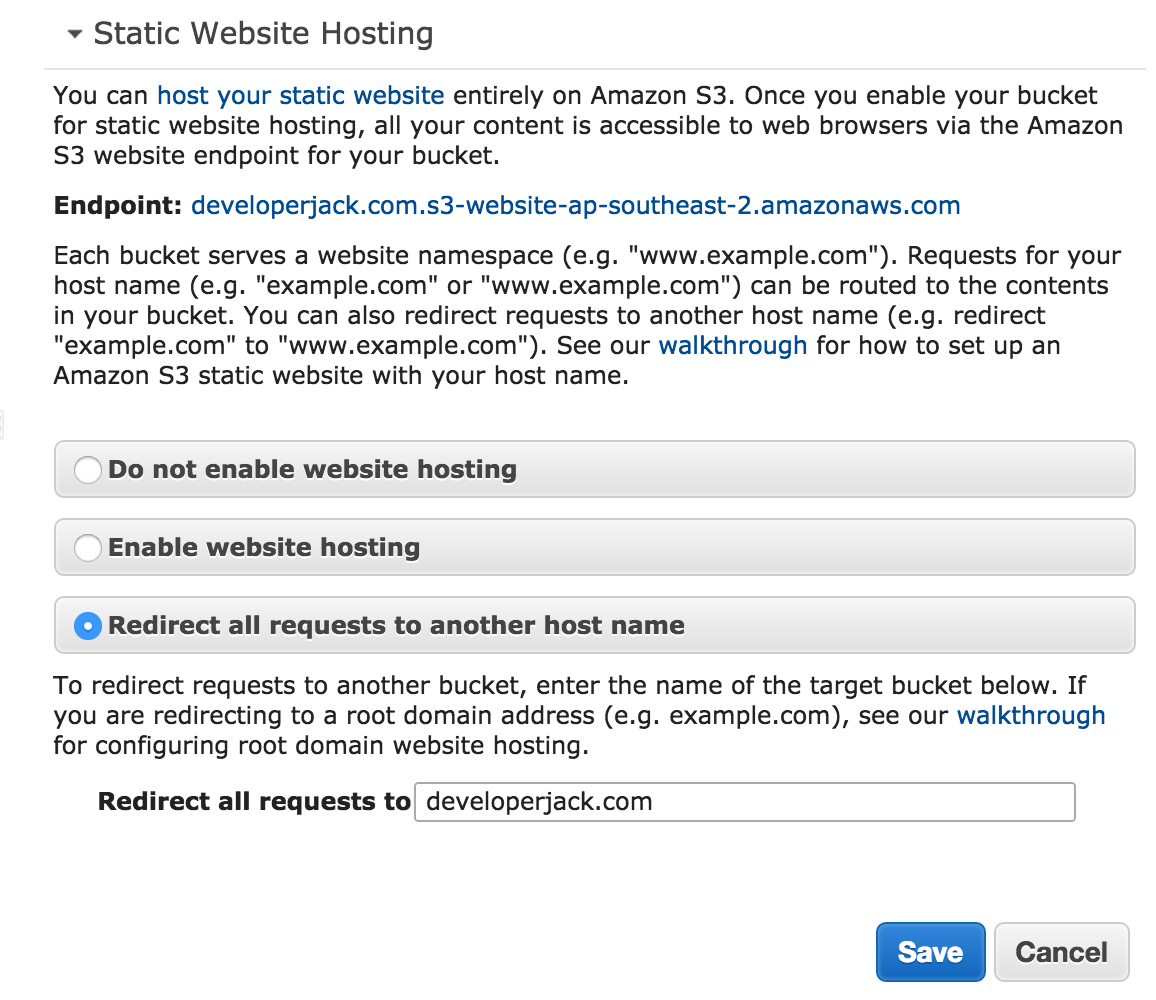
Simple storage service (S3) has a very cool feature that lets you serve your website straight from an s3 bucket. Adding this configuration to your bucket properties and S3 will serve up the right HTTP headers for your site.
Route53
Route 53 is relatively simple to configure for my domain, so I’ll not dwell here. The reason I list it now and not later is that you can point route 53 directly at your bucket if you like. There’s a nice write up on how to do just that.
I however went a little overboard here, because I wanted one of those shiny green SSL things! All the cool blogs have it right?
CloudFront
My humble little static site is now served up from 53 locations in 37 cities from around the world – it’s the power of a CDN. Configuring an SSL for CloudFront I opted for the ever so slightly cheaper option to use SNI since
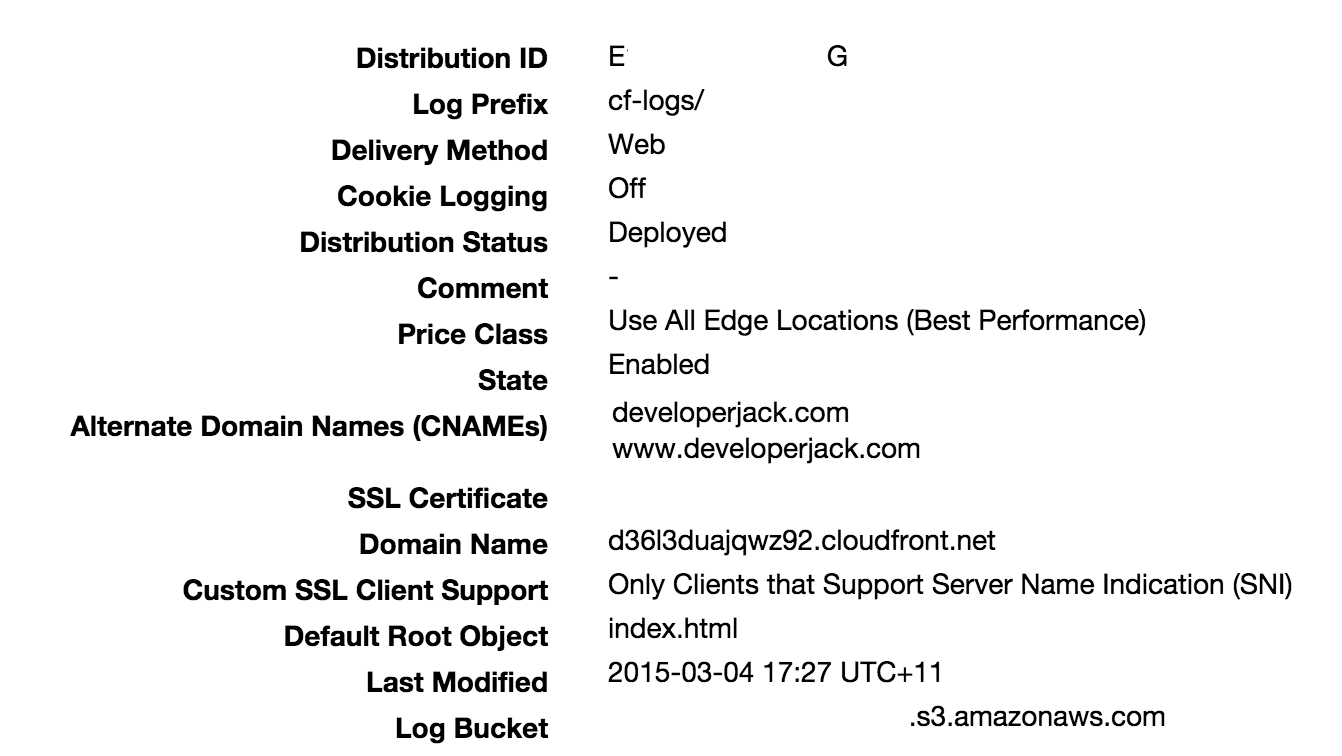
And yes, if you try it, you can access this very page at d36l3duajqwz92.cloudfront.net (well at least for now). Note that it uses CloudFront’s SSL certificate and not mine?
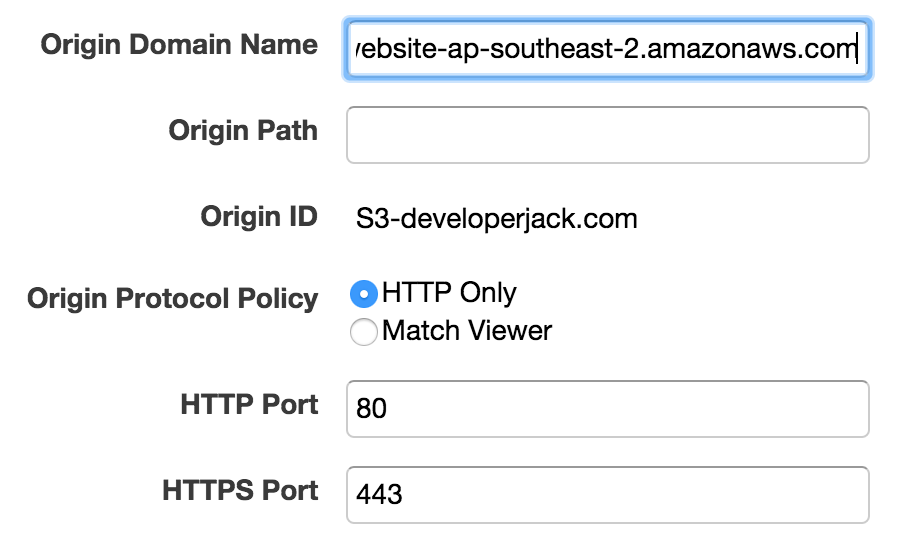
Now there’s a few tricky things with CloudFront, gotchya’s if you will. Most of it can be solved with a little fiddling around (and a general understanding of how caching headers work with CDN’s). The most irritating thing however was the configuration of my origin. For best results (I had issues with Cache-Control etc. while trying to publish an early draft of this post) don’t use a pre-populated S3 bucket. Instead, manually enter your S3 website bucket URL (that’s the static site url NOT the bucket’s address). My origin configuration looks a little like this:
So that’s it! Every time I update my blog’s git repo, Codeship pushes my code off to an S3 bucket to be distributed across the world – and there’s not a single managed server in there at all! Simple right?
A note on pricing
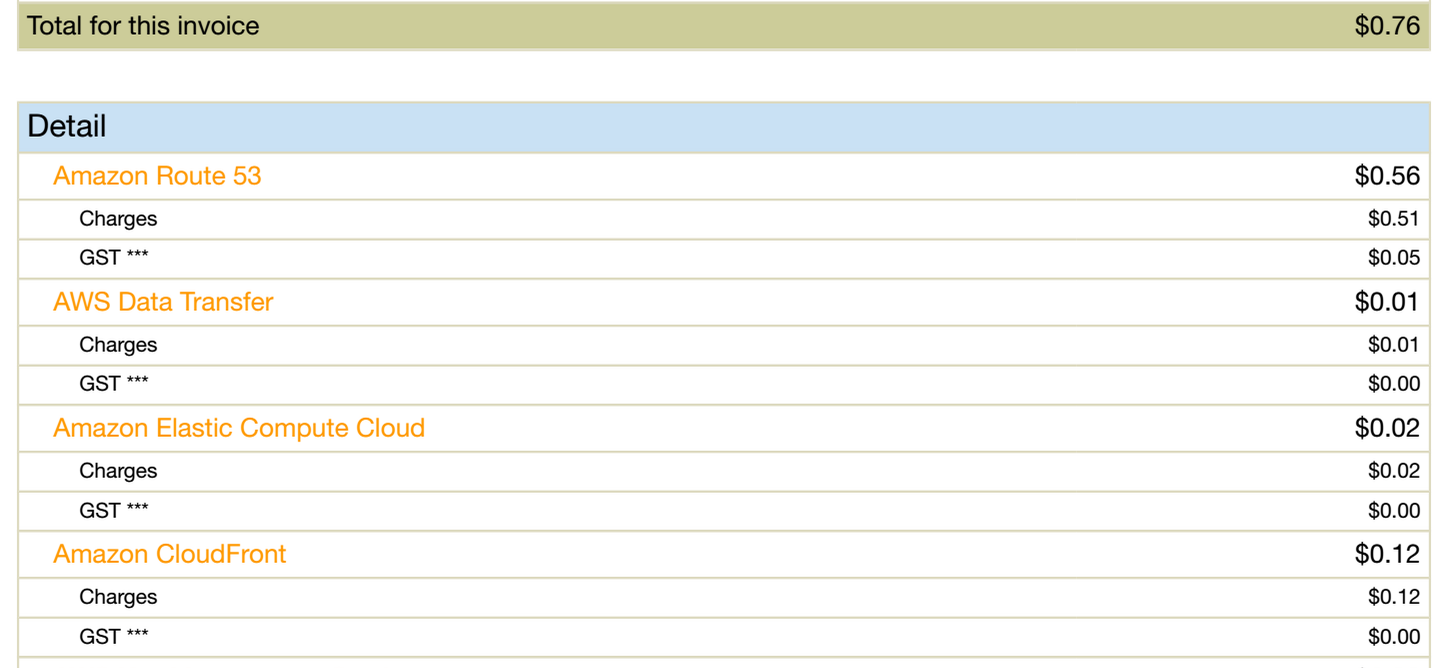
You guessed it, this whole setup isn’t free. AWS costs me 50c a month for the zones, and unless the greater internet decides I’m somewhat interesting then my traffic won’t even blip on the cost radar for S3 and CloudFront. Luckily the guys at Codeship offer a free tier of 100 builds a month (and if I’m blogging 100 times a month then I’ll know I need something better to do with my time).
Ultimately the whole setup costs < $1 AUD a month – yippee!
Edit: 04/Apr/2015
So with perfect timing (as if Amazon was just watching my blog tweets) I received my amazon bill this morning for a full month’s usage. As you can see it’s pretty light on the credit card!


Add comment